Deploy jekyll website on github pages
This is a step by step tutorial on how to create a jekyll webiste/blog and deploy it to your own github pages
What is jekyll
Jekyll is a blog-aware static site generator especially usefull for small personal/organizational project. Instead of using databsees, Jekyll takes the content, renders Markdown and Liquid templates, and produces a complete, static webiste ready to be served. Jekyll is the engine behind Github Pages, and you can host your Jekyll website on Github pages as well.
Using Jekyll to create a blog let you focus on blog content itself rather than building a blogging platform
Quickstart
-
Before installinbg any Jekyll packages, make sure that you have all environments that Jekyll needs: Ruby and RubyGems.
Install a full Ruby development environment - Install Jekyll and bundler gems
gem install jekyll bundler - Create a new Jekyll site at
./myblogjekyll new myblogYou can name it whatever you want
- Change into that new directory
cd myblog - Build the site and make it available on a local server
bundle exec jekyll serveAfter you run this for the first time, you can build the site with just
jekyll serve - Browse to http://localhost:4000
Breakdown
After you create your new Jekyll site in step 3, there should be a folder called myblog(or whateber you name it) in your targeted directory where you run that code. This is a simple Jekyll website with the default template minima
- _config.yml
You can access all the configuration in the _config.yml
 title: Your awesome title
 email: your-email@example.com description: >- # this means to ignore newlines until "baseurl:"

 baseurl: "" # the subpath of your site, e.g. /myblog
 url: "" # the base hostname & protocol for your site, e.g. http://example.com
 twitter_username: jekyllrb
 github_username:  jekyll

 # Build settings
 markdown: kramdown
 theme: minima
 plugins:
    - jekyll-feed
You can add and change any of these attributes as per your own needs and access them by site.ATTRIBUTENAME. For example, site.title is Your awesome title
- _layout
_layout is a folder where you put your layout template, which is in the form of html. They allow you to have the source code for your template in one place so you don’t have to repeat things like your navigation and footer on every page. The convention is to have a base template called default.html and have other layouts inherits from this as needed by using Front Matter.
- _includes
_includes works similarly in the concept as _layouts. It saves work from writting repeated codes like header, footer, navigation or even code in <head> tag.
To include, just use { % include footer.html % }
- _posts
_posts is probably the folder you will use the most. It contains all your blog contents. Files are in the form of Markdown and has to obey name convension YEAR-MONTH-DAY-title.md. For example, 2012-09-12-how-to-write-a-blog.md.
Each Mardown file contains Front Matter, which specifies attributes of each post. It usally uses post layout.
 ---
 layout: post
 title:  "Welcome to Jekyll!"
 ---

 # Welcome

 **Hello world**, this is my first Jekyll blog post.

 I hope you like it!
What is Github pages
Github Pages is a free static site hosting service designed to host your personal, organization, or project pages directly from a Github repository. That being said, as long as you have a github account, you can host your Jekyll website for free.
Github Pages is free for subjecting to these limitations:
- GitHub Pages source repositories have a recommended limit of 1GB .
- Published GitHub Pages sites may be no larger than 1 GB.
- GitHub Pages sites have a soft bandwidth limit of 100GB per month.
- GitHub Pages sites have a soft limit of 10 builds per hour.
However, it is enough for a personal project or a small business project.
There are many but similar ways to host your Jekyll webite, here is the one that I used.
-
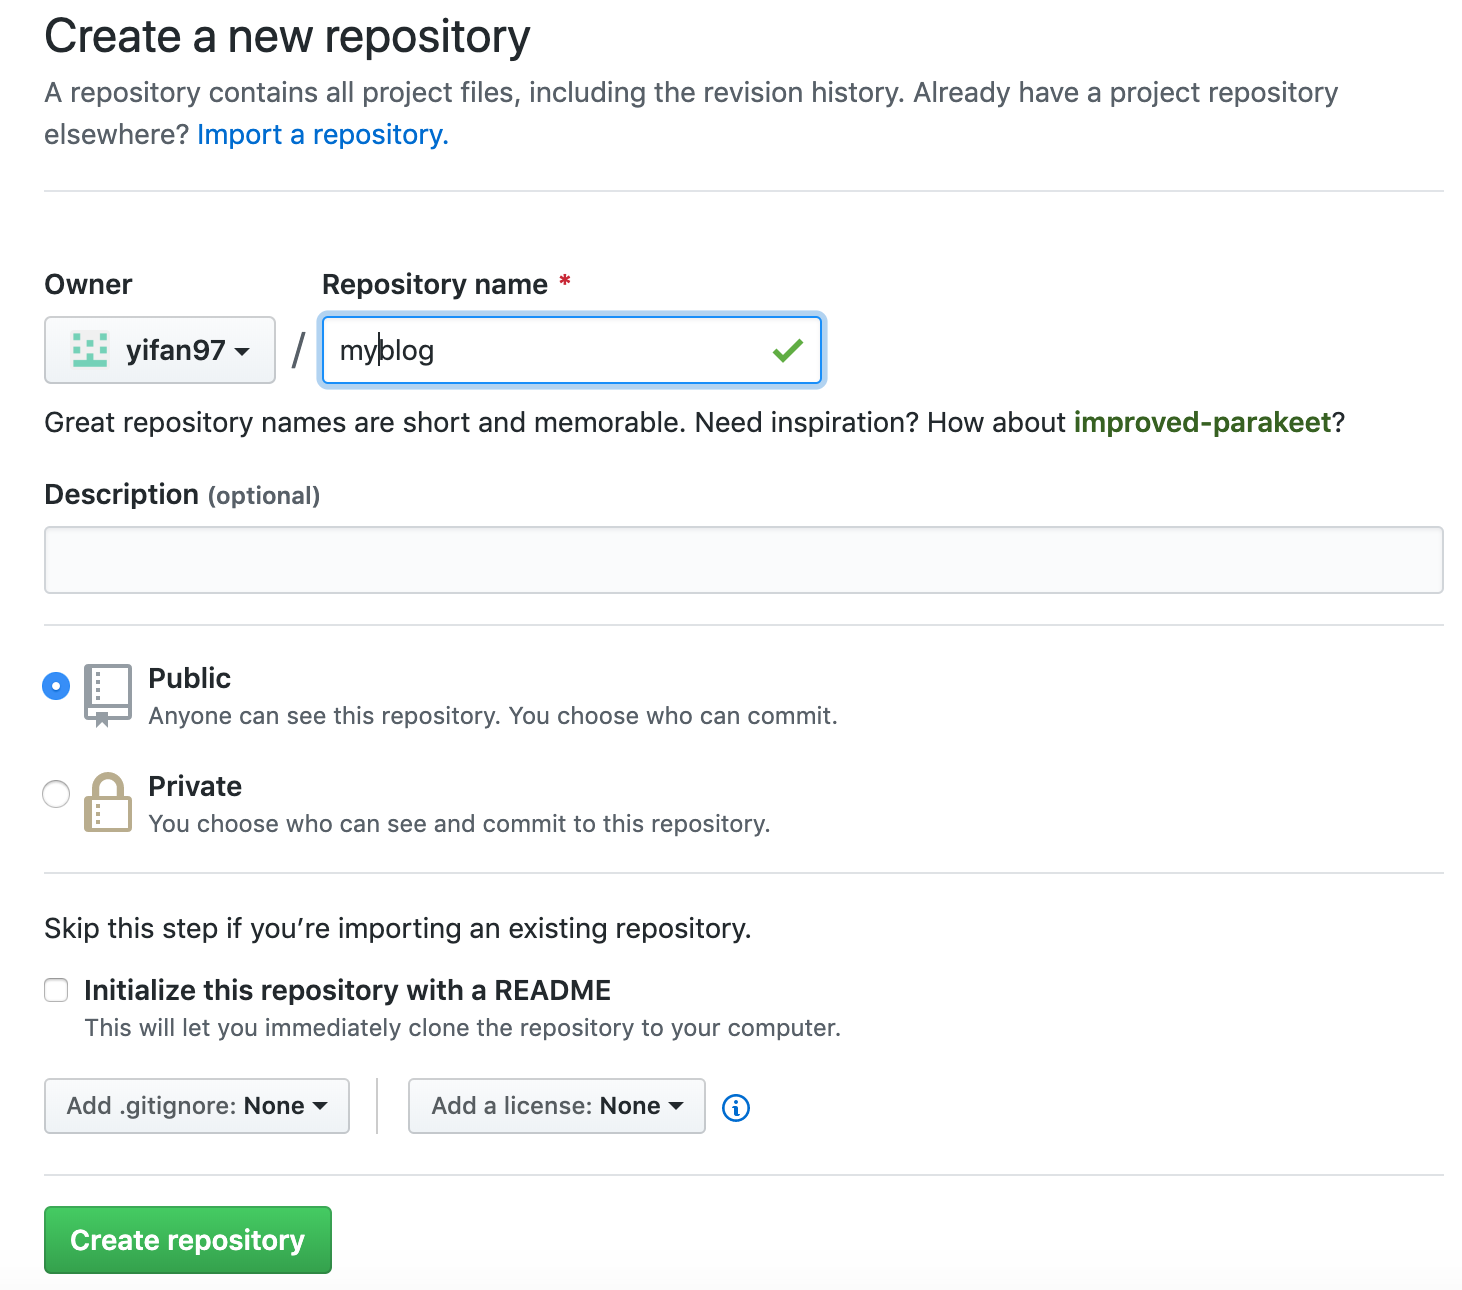
Create a new respository and name whatever you want. Click
Create repositorywithout checkingInitialize this repository. After that, do nothing to this page.
- Go to your Jekyll file and follow these steps to push everything to your newly-created repository.
~$ git init #checkout the gh-pages branch, this is for generating your github page. #it must be gh-pages exactly. ~$ git checkout -b gh-pages ~$ git remote add origin REPOSITORY_URL ~$ git add . ~$ git commit -m"initial commits" ~$ git push origin gh-pages -
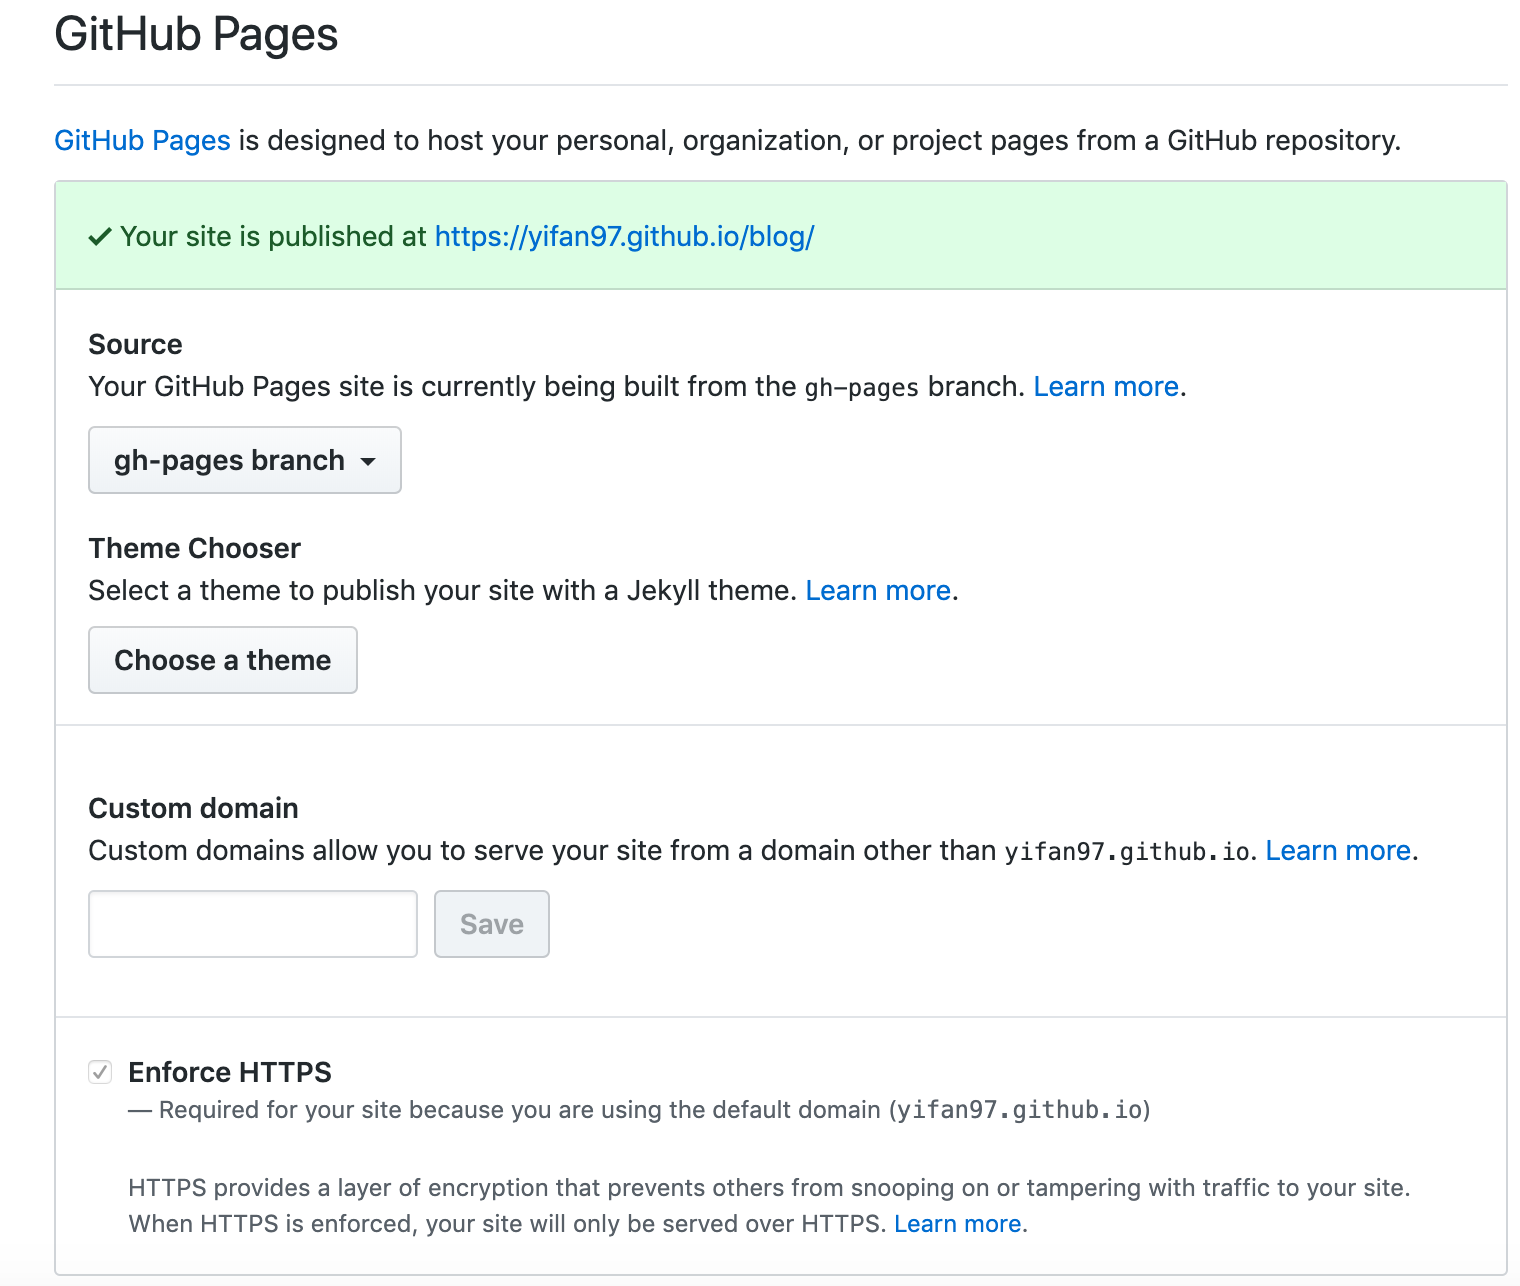
Go back to github repository and refresh. Go to settings.

- Scroll down to Github Pages section, and you will see a url generated by Github. Wait for a while for Github to deploy your webiste.

Toubleshooting
Everything works fine on localhost but no styling rendered on github pages.
Set the baseurl in you _config.yml to be your repository name. For example, baseurl: /myblog
Some people are getting error when they run
gem install jekyllERROR: While executing gem ... (Errno::EACCES) Permission denied @ rb_sysopen - /Users/USERNAME /.rbenv/versions/2.6.2/lib/ruby/gems/2.6.0/gems/jekyll-3.8.5/.rubocop.yml
Everything under /Users/USERNAME/.rbenv/versions should be owned by your user account. However, now it looks like you don’t have permissions to write to some files under that path, which means that you probably used sudo gem install when you shouldn’t have.Fix this with sudo chown -R USERNAME:staff /Users/USERNAME/.rbenv, and NEVER use sudo gem install when working with rbenv-managed Ruby versions.
[ refer to this github issue ]
If you have more issues, check out: